How to Add Files on Google Drive

Google Drive provides you online storage to store your documents, photos, audios, videos, etc. If you also have a Google account, then it means you have 15GB free storage on Google Drive. Everyone who has a Google account has this free storage. Users can also expand their Drive storage by paying for the extra storage plan.

Google Drive.png

You can upload content from your mobile, computer, laptops, etc. to the Google Drive and customize your device to sync your data to the Drive. With free storage there is another benefit of the Drive is you can access contents of the Drive at any time in any device by using your Google account.

If you also want to use Google Drive storage, then uploading files on Drive is as simple as uploading a photo on Facebook.

How to add files on Google Drive by using the desktop browser

You can upload files on Google Drive for free but up to only 15GB. You can expand your storage capacity by purchasing additional storage.

  1. Open your preferred browser.
  2. Type ‘drive.google.com’ and search to go to the main page or open Google Drive.
  3. Click on the ‘Go to Google Drive’ a blue color button in the middle of the page. Ignore if already logged in and continue from 5.
  4. Log in with your Google Account’s email address and password.
  5. Now, click on the blue ‘New’ button at the top-left corner of the page.
  6. Click on the ‘File upload’ option from the drop-down options to upload a specific or multiple files. Or,
  7. Click on the ‘Folder upload’ option to upload a full folder.
  8. Navigate and select your files or folder to add on your Google Drive.

(To select more than one file, hold down ‘Ctrl’ or ‘Command’ key and then click on the file to select.)

  1. Click ‘Open’ button at the bottom of the file selecting Window to begin uploading your selected files to Google Drive. Or,
  2. Click ‘Ok’ button to begin uploading a whole folder.

Your selected file or folder start uploading to Google Drive, and Uploading time will depend on the size of the data and your internet connection. Wait for complete uploading.

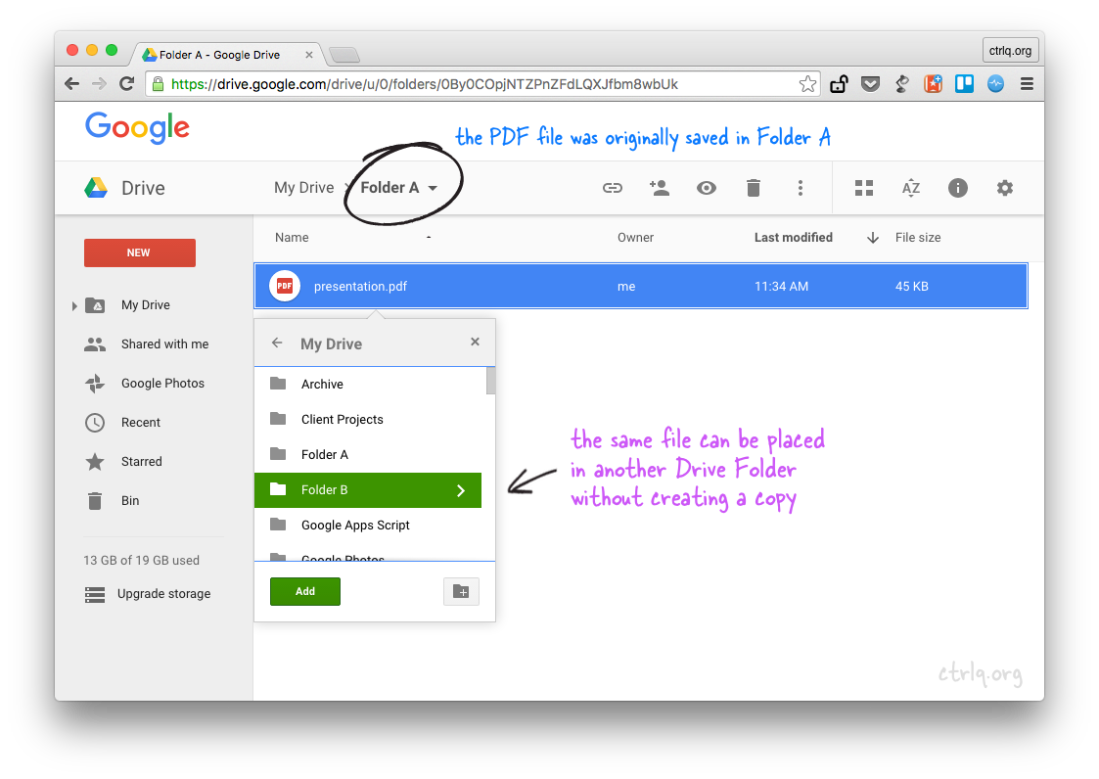
To organize the files:

Once your file or folder uploaded successfully to Google Drive, you can access them from any device by using your Google ID.

  1. To move: Click and drag the file to the folder, you want to move.
  2. To delete: Right click on the file and select ‘Remove’ from the options, to remove from the Drive.
  3. To make a new folder: Click ‘New’ button, select ‘Folder’ from the options, give a name and press ‘Enter.’

How to add file on Google Drive from your phone

If you don’t have the Google Drive app on your phone, then you can install it from the ‘iPhone App Store’ or ‘Google Play Store.’

  1. Tap on the ‘Drive’ app icon on your phone to launch the app.
  2. Log in with your Google Account’s email address and password.
  3. After login, tap blue color ‘Add (+) button’ at the lower-right corner of the screen.
  4. Tap ‘Upload’ in the popup menu to choose a file.
  5. Navigate and select which kind Files(Photos and Videos) of the file you want to upload.
  6. Tap and hold the file to select or just tap, continue tapping to select more files.
  7. Now, tap ‘Upload’ at the upper-right corner of your screen.

Now, your selected files start uploading to Google Drive. Uploading time will depend on the size of the data and on your internet connection. Wait for complete uploading.

Edward Lewis is a creative person who has been writing blogs and articles about cyber security. He writes about the latest updates regarding mcafee.com/activate and how it can improve the work  experience of users. His articles have been published in many popular e-magazines, blogs and websites.

How to Restrict Automatic Apps Delete in iOS 12

 iOS 12.jpg
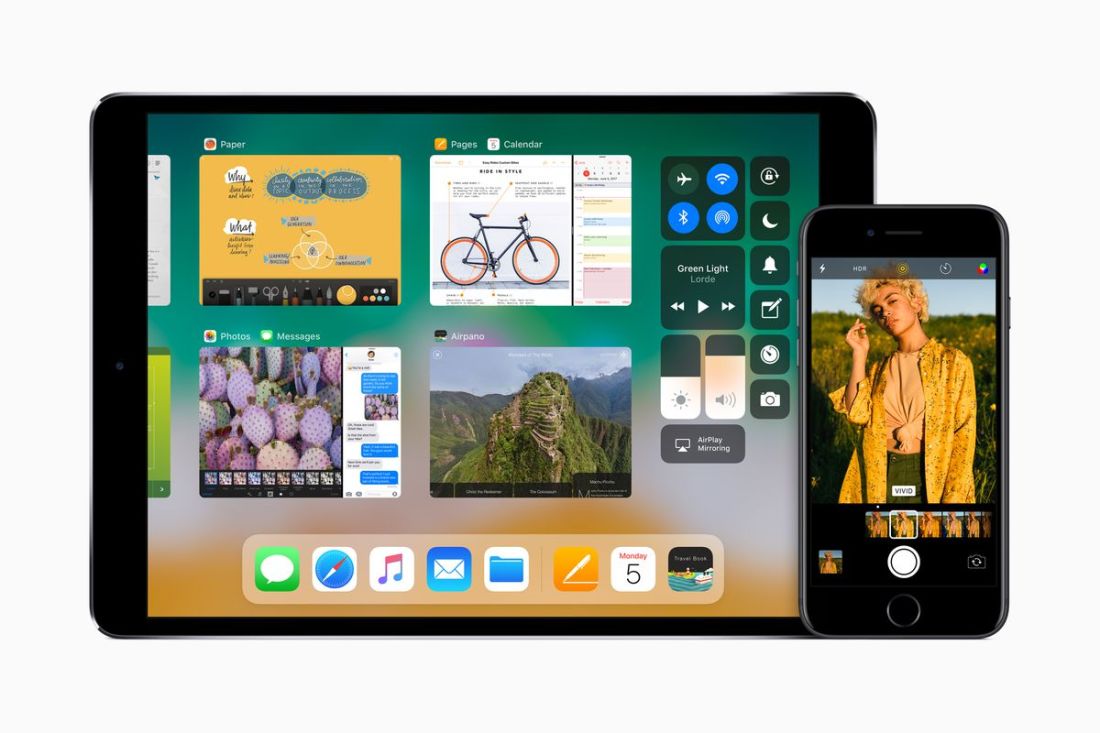
Apple added a new feature called Offload in its iOS 11 OS which continued to follow in the iOS 12 version. The internal storage of the phone is necessary to have free space or else the stored data will slow down the performance of the device. The company added the feature to tackle the low storage of the phone. With the activation of this feature, the apps get deleted automatically. The reason for the automatic removal of the apps is unknown for most of the users, as they are not aware of the Offload feature.

But there is no need to worry as the activated Offload feature can be disabled permanently to prevent the app deletion from iOS 12. There three methods approaching successfully. The one option is providing the selection of apps which you want to keep while the other methods are completely turning off the Offload feature in the phone.

Here’s how to restrict automatic apps delete in iOS 12

Selecting specific apps to keep them in the device

  1. Open the Settings on your iOS 12 device.
  2. Tap General and go to device Storage.
  3. Now select the useless app that you want to delete or Offload.
  4. In the next tab, there is an option saying Offload Unused Apps.
  5. Tap on the option.
  6. Now, tap on it again to offload the app.

In this way, the selected will remain in the device while the other apps will be deleted whenever the operating system wants to. But, if the Offload Unused Apps enabled, then any app can be removed anytime and you will re-download some of these apps while opening them. Hence it would be necessary to disable the Offload option.

Turning Off the complete Offload Software

  1. Launch the Settings app of iOS 12 device.
  2. Now tap the General Button.
  3. Select iTunes and tap on App Store.
  4. Navigate to Offload Unused Apps.
  5. Tap the toggle button to turn it off. Make sure it gets white or grey when disabled.

Restricting the Apps from Delete

  1. Open the Settings in your iOS 12 device.
  2. Now, go to Screen Time and tap to open it.
  3. In the new display, four will appear.
  4. Select Content & Privacy Restrictions and tap to open.
  5. Tap on the iTunes & App Store Purchases option.
  6. Go Deleting Apps and select Don’t Allow.

The automatic feature is not disabled, and the operating system won’t delete the apps by its own. The Offload Feature was developed to clear up the device when the storage capacity is decreasing. Since the methods are applicable, you can choose which one is suiting you the most.

Edward Lewis is a creative person who has been writing blogs and articles about cybersecurity. He writes about the latest updates regarding mcafee.com/activate and how it can improve the work experience of users. His articles have been published in many popular e-magazines, blogs, and websites.

Source  : https://setmcafee.com/how-to-restrict-automatic-apps-delete-in-ios-12/


How to put a Shortcut of a Website on your Desktop

When you use a particular website like any social media site, information site a lot, it consumes time to reach to that website. The process is long and first you need to open a browser, enter and search for the website, then find the original website it takes too much time. So, placing a desktop shortcut of that site or page on your computer screen will save your time and also be more convenient.

Shortcut of a Website on your Desktop (2)

You can also add your regularly used website or webpage to your Favorites or Bookmarks. But there is an extra benefit of creating website’s shortcut on the desktop. You will remind about any important work on that website. And this is also shorter method than adding in bookmark or favorites. You can frequently visit your useful website by simply double-clicking on the website’s icon and it will directly open the site on the browser.

Various browsers are there all have the different method to create a website’s shortcut. Here is the guideline for creating in some common browsers.

How to create a shortcut of a website from Google Chrome

  1. Open ‘Google Chrome’ browser in your PC.
  2. Open the ‘Website’ of which you want to create a shortcut on your desktop.
  3. Click on ‘Menu’ button. It is the three vertical dots icon on the upper left corner of your browser.
  4. Go to ‘More tools.’
  5. Click on ‘Add to desktop’ or ‘Create shortcut.’
  6. Now, a confirming window will appear on your desktop, and here you can give a name to the shortcut. Otherwise, it will save as the site’s title name.
  7. Mark ‘Open as window’ to open the website in a new window, unmark for not.
  8. Click ‘Add’ to create a desktop shortcut of the website.

Website’s shortcut has successfully created on your screen. To open shortcut simple ‘Double-click’ on the icon or Right click on the icon then select open.

How to create a shortcut of the website from Firefox, Internet Explorer in Windows and macOS

  1. Open any of your web browsers, (Firefox, Safari or Internet Explorer).
  2. Open the website in any browser of which you want to create the desktop shortcut.
  3. Make sure your web browser is not in full screen to create shortcut easily.
  4. Click on the ‘Address bar.’ This will reveal the Website’s entire address as well as the Website’s icon.
  5. Click and drag the Website’s icon from the address bar.
  6. Release the Websites icon or address on your desktop.

This will create a shortcut of that Website on your screen. To open shortcut ‘Double-click’ on the icon or Right click on the icon and then select open. You can create the shortcut for any part of any website, but the sites that require a login will still call for login when you open the shortcut.

Edward Lewis is a self-professed security expert; he has been making the people aware of the security threats. His passion is to write about Cyber security, cryptography, malware, social engineering, internet and new media. He writes for Norton security products at norton.com/setup.

Source  : https://how-to-setup.net/how-to-put-a-shortcut-of-a-website-on-your-desktop/


How to fix YouTube not working problems

YouTube is an online video platform website. It contains thousands of videos, including music videos, movie trailers, video clips, TV shows clips, short and documentary films, live streams, audio recordings and a lot of videos categories. YouTube provides too many services to its users. You can view, upload, share, comments and do more things on YouTube.

fix YouTube not working

Mostly everyone uses YouTube according to their purpose; some peoples use it for entertainment, some use it for education and business purpose, or anything else may be the reason. But, this will disappoint you when you notice that YouTube is not working on your device. This can be the real pain for those who are addicted to it and use it regularly.

If you’re also having trouble accessing YouTube and watching videos, etc. Then apply below-given solutions to solve these types of fundamental issues.

How to fix YouTube not working in Pc or Google Chrome

Methods to fix:

  1. Check your internet connection.
  2. Update your browser (Chrome).
  3. Turn on JavaScript on your browser.
  4. Clear Cache and Cookies from the browser.
  5. Check Extensions.

How to check and fix the internet connection

Maybe YouTube is not working because of the internet problem.

  1. Open your browser.
  2. Visit random websites to check your internet connection is working or not.
  3. Connect to the internet if it is not. And check again it is working or not.
  4. Reset the router. If still there is an internet problem.

How to update your browser

If you can’t watch YouTube videos in your chrome browser, then try to upgrade your browser. Maybe this will help in to fix the issue.

  1. Open ‘Chrome’ browser.
  2. Click on ‘Three vertical dots’ icon in the top right corner of your screen.
  3. Click on ‘Help.’
  4. Choose ‘About Google Chrome.’
  5. If there an update is available, then click ‘Install’ and follow the instructions to update it.

How to turn on JavaScript

You have to enable JavaScript of your browser to watch YouTube videos. To check it is turned on or not.

  1. Open ‘Browser’.
  2. Click on ‘Three vertical dots’ icon in the top right corner of your screen.
  3. Click on ‘Settings.’
  4. Click on ‘Advanced’ at the bottom.
  5. Click on ‘Content Settings.’ It is second last under the privacy and security section.
  6. Click on ‘JavaScript’ in the content settings.
  7. If already enabled, then leave. If not, then click on ‘Allowed’ button.

When you’ve done, reload YouTube and check the video.

How to clear cache and cookies

  1. Open ‘Chrome’ browser.
  2. Click on ‘Three vertical dots’ icon in the top right corner of your screen.
  3. Click on ‘More tools.’
  4. Click on ‘Clear browsing data.’
  5. Select ‘Time Range.’
  6. Mark ‘Cookies and cache’ options, leave if already marked.
  7. Click ‘Clear data.’

Restart your browser and check for the problem, it is fixed or not.

How to check Extension create problem or not

To figure out whether an extension is the cause of the problem or not, try to play a video on YouTube in incognito mode. If you’re able to watch YouTube video in incognito mode, then figure out which one extension you had installed from when the issue began and delete it. To do this,

  1. Open ‘Chrome’ browser.
  2. Click on ‘Three vertical dots’ icon in the top right corner of your screen.
  3. Click on ‘More tools.’
  4. Click on ‘Extensions.’
  5. Click on ‘Remove’ to remove the extension which creates the problem.

Now, try to play the YouTube video in normal mode.

Edward Lewis is a creative person who has been writing blogs and articles about cybersecurity. He writes about the latest updates regarding mcafee.com/activate and how it can improve the work experience of users. His articles have been published in many popular e-magazines, blogs, and websites.

Source : https://mcafee-activate-key.com/how-to-fix-youtube-not-working-problems/


How to Make a Customized Quick Action in MacOS Mojave

Apple recently introduced its latest desktop operating system in MacOS Mojave. The new operating system has new cool features and old features as well. But a thing which should be noted is that the old features have been improved in the new desktop operating system. FaceTime and Continuity Camera are one of the best features that Quick Action has in Mojave. The new desktop operating system on Mac allows the users to customize the Quick Action. If you have switched to MacOS Mojave, then you must be trying to customize it. If you encounter any struggle, then follow the steps mentioned in the guide as it is providing the best way to customize the Quick Action in MacOS Mojave.

MacOS Mojave

Here’s how to make a customized Quick Action in Mojave

  1. Open Spotlight and click to launch the Automator app on your MacOS Mojave.
  2. Click the New Document tab.
  3. Click the Contextual Workflow/ Quick Action Workflow.
  4. Select the Choose button.
  5. Now, click the Action tab from the left panel of the window.
  6. Select Photos and Scale Images action.
  7. Now, click the Add button.
  8. Click the “To:” drop-down button and select Downloads.
  9. Go to Scale Images, select To Size.
  10. Now, type in 1000 as the number.
  11. Click Files & Folders and select to Rename Finder Items.
  12. Ignore the Copy Finder Items action dialog box.
  13. To add text to the file name, go to Rename Finder Items.
  14. Now, click the Add Text option.
  15. Go to Add field and type resized.
  16. For automation, go to Finder.
  17. Now go to Service receives selected and select Image files.
  18. Click File and select Save option.
  19. Now name the action like resize 1000.

When you right click on an image, a menu appears with options where Resize to 1000 is one of them. It will not show the Quick Action as our choice but, it appears under the “More” button.

Let’s see the steps to add Resize to 1000 in the Quick Actions.

  1. Click the Apple logo to open the menu box.
  2. Select System Preferences.
  3. Click the Extensions and go to Finder.
  4. Ensure that Resize to 1000 is enabled.
  5. Now, click the More button to view Resize to 1000 in the Quick Action.

Remember Quick Action only works with image files so you can use images only in Quick Actions. Still, the Quick Actions will provide the users with more power and control to customize the device according to their needs and desires.

Edward Lewis is a creative person who has been writing blogs and articles about cybersecurity. He writes about the latest updates regarding mcafee.com/activate and how it can improve the work experience of users. His articles have been published in many popular e-magazines, blogs, and websites.

Source : https://setmcafee.com/how-to-make-a-customized-quick-action-in-macos-mojave/

How to Get the Best Results From Facebook Search

Best Results From Facebook SearchFacebook is much more than just a news feed full of funny memes. The famous social networking site is probably the biggest repository of personal information.  In reality, It is not that easy to find the information you need at any given moment. Facebook is the new Google when it comes to search for friends or acquaintances. Facebook is a giant searching tool. Although many of its users are not aware of its hidden features, with the help of these cool features, Finding people will become much easier and convenient.

Searching  For Friends On Facebook

This is an easy step. We all probably search for our friends to connect with them. But while typing the name, make sure that you keep an eye on suggestions given on right side of the page. Facebook search provides suggestions from mutual friends, friends of friends and even the common groups. Although the suggestion tab works fine in most cases, what about the one who is strangers completely?

Enter Email Address or Phone Number in the search bar

If you are lucky to have their email address or phone number then simply enter it in the search bar. Facebook will present the most relevant results for you. You can give it a shot just by typing your own email address or phone number.  If you have registered your phone number in the profile info section, then you will see your profile. There are chances that some of the users have not registered their phone number and email ID, for these shortcomings, there is a way out. Just Type in the search bar the first name along with any information you have such a school name, college name, and any other information. This will fetch the most relevant results for sure.

How to Find Posts On Facebook?

All you need to do is to just type few keywords in the search bar. For instance- If you want to look for a recent post about Ariana Grande, then enter Ariana Grande in the search bar. Facebook search will help me back to you with recent and trending news about Ariana.

Go through your History On Facebook

There is nothing easier than this to refresh your memory. You activity log stores each activity of your such as your comments, the posts you have liked and much more. Activity log also keeps a record of your Facebook search history.

To conclude, most of the search results depend heavily on the privacy settings of your friends on Facebook. If you have put up very high privacy settings on Facebook, then your post might not show up in search results.

Edward Lewis is a creative person who has been writing blogs and articles about cybersecurity. He writes about the latest updates regarding mcafee.com/activate and how it can improve the work experience of users. His articles have been published in many popular e-magazines, blogs, and websites.

 Source : https://mcafee-activate-key.com/how-to-get-the-best-results-from-facebook-search/

Ways to Set up an Echo or Echo Dot

After unboxing Echo remove plastic protection from the unit and plug its power supply into a wall socket. There will be LED circling on top, and after a while, Alexa will tell you to use the app for a complete setup. If you still have not downloaded it, follow these steps:

Set up Echo or Echo Dot.jpg

  1. Launch Amazon app on your gadget.
  2. Sign in with your Amazon account.
  3. Now go to your device’s Settings and Wi-Fi settings.
  4. Look for new Echo in the list, it will appear as Echo-2JZ. Click on it, and it will connect itself.
  5. Switch back to the Alexa app now. If it doesn’t start the process itself, click on three horizontal lines and select Settings>Set up a new device.
  6. Now select home Wi-Fi network from the list and enter a password.
  7. Now Echo will try to connect to your Wi-Fi network.
  8. Alexa now should announce that she is ready to go.

Now asking for time, try saying, Alexa tell the time, she should now respond with the current time. If you are blessed with more than one Echo device, then each one has to be set up individually.

 Is it compulsory to say ‘Alexa’?

Not really, the default wake word is Alexa, but this can be changed to Amazon, Echo or computer by going to Settings in Alexa app. It is not allowed to choose your own wake word. For finding out the Settings:

  1. Tap on three horizontal bars at the top left corner of the app.
  2. Select Settings from the menu.
  3. To make her useful, set your location in Alexa App. This will be under Settings. You can change units of measurement for weather forecasts and distance.


Alexa is an amazing virtual assistant; it may not be perfect but is improving really fast. You can personalize it to perform so many functions for you. Enjoy the fantastic experience now.

Edward Lewis is a self-professed security expert; he has been making the people aware of the security threats. His passion is to write about Cyber security, cryptography, malware, social engineering, internet and new media. He writes for Norton security products at norton.com/setup.

Source: https://how-to-setup.net/ways-to-set-up-an-echo-or-echo-dot/

How to Retrieve Mail with Time Machine on MacOS

Time Machine on MacOS

If you have deleted some critical data from your Mac system, then you don’t have to worry about it. There is a way to recover the lost data on your computer. The Time Machine in MacOS is an inbuilt service that helps to recover or retrieve the deleted emails in Mail application. The developer company, Apple, generally put charges to use their services, but the Time Machine is a service which is not chargeable.

Since the Mail app keeps the entire data in the Mail folder under the Library of Macintosh HD, you can refer the user account library. It will prevent you from restoring the backup of your system which may cause you to waste your time and lose the party applications. Let’s see the steps to recover lost mail in the MacOS system.

How to Recover Mails with Time Machine

  1. Click the Apple icon to open the menu from the top left.
  2. Select System Preferences from the menu.
  3. Now, move to Time Machine and click to open it.
  4. Click on the toggle button to Turn Machine On.
  5. Go to your Home Directory.
  6. Press the option key and choose Library from Go
  7. Open the Library folder and navigate the Mail folder.
  8. Double click the Mail folder.
  9. Find the folder starting with the letter “v” and click to open it.
  10. Check for the most recent modification date.
  11. Now, check the long hexadecimal string folders.
  12. You have to go through every long hexadecimal folder to find the one having the mailbox you want.
  13. Restore the file with the name of lost or damaged mailbox on the home screen.
  14. Close the Time Machine and open the Mail.
  15. Now, click File and select Import Mailboxes.
  16. Select Apple Mail and click Continue.
  17. Click the folder which you restored on the home screen.
  18. Click Choose option.
  19. The mailbox will get recovered at the bottom.


Once you are done with the process, you must organize the mailbox as it was before. You will find the recovered mailbox somewhere in the mailbox. This is how you can retrieve all the lost emails with the help of Time Machine in your Mac system.

Edward Lewis is a creative person who has been writing blogs and articles about cybersecurity. He writes about the latest updates regarding mcafee.com/activate and how it can improve the work experience of users. His articles have been published in many popular e-magazines, blogs, and websites.

Source : https://setmcafee.com/how-to-retrieve-mail-with-time-machine-on-macos/


How to Play Secret Adventurous Game on Google

 Play Secret Adventurous Game on Google

Google previously was just a search box providing all sorts of results for the searches that people needed. With time, the company has put efforts in releasing various services like YouTube, Gmail and then Google Drive. With the evolution of Google, the company released its renowned web browser, Google Chrome. We all know that Google has its iconic Dinosaur game available only in Google Chrome when the internet goes down. The dinosaur game is a perfect game to pass your time while waiting for the internet connection.

Do you know that the Dinosaur game is not the only game that Google has for its users to play? It is true that there is another adventurous game available to play on Google, but where to find it? There is a little trick to find and play the secret games. The game is accessible only to those who know the method to uncover it. Surely you too want to play the hidden game on Google. The trick is workable on Microsoft’s browsers and Mozilla Firefox as well, but it gets awry on Microsoft’s browser. If you want to play the game, then Google Chrome browser is highly recommended to you while using the trick.

Here’s How to Play Secret Adventurous Game on Google

  1. Open Google Chrome
  2. Now, go to the com and click the search box
  3. Now, type text adventure and press Enter.
  4. Right-click on the page.
  5. Now, select Inspect from the menu.
  6. You can press Ctrl + Shift + I keys in Windows system.
  7. If you are using Chrome in Mac, then press Cmd + Options + I
  8. A box will appear on the right side of the tab asking “Would you like to play a game?
  9. Now type Yes and press Enter.
  10. The hidden will come out in front of you.
  11. You will play a big blue G of the Google logo with the simple commands to proceed in the story.
  12. Type northsoutheast or west to move around and interact with things by typing grab or use.

It might sound boring as you need to enter the commands, but it is not complicated. Once you start playing, it will keep you busy for a long time.

Edward Lewis is a creative person who has been writing blogs and articles about cybersecurity. He writes about the latest updates regarding mcafee.com/activate and how it can improve the work experience of users. His articles have been published in many popular e-magazines, blogs, and websites.

Source : https://mcafee-activate-key.com/how-to-play-secret-adventurous-game-on-google/


The Comprehensive Guide to Sleep Tracking Technology

Even though people sleep for one-third of their lives, they do not know much about how they sleep. If you are sleeping for the required eight hours per day but still feel that you are not well rested, then you must not be getting quality sleep.

Tracking Technology.png

Changing your sleeping habits conclusively changes your life. So rather than speculating the number of hours you are sleeping for or pondering wondering if you kept tossing and turning through the night, get actual statistics by tracking how much you sleep. Let’s read more about the different sleep tracking technologies.

Using the smartphones

Even though keeping technology as far away as possible while going to sleep is recommended, if you do take your smartphone to bed with you, then you can use it track your sleep. Most people keep their phones with them because of alarms. Well, you can download a sleep tracking application and activate it before going to sleep.

Sleep apps

Many sleep applications make use of the smartphone’s accelerometer or the sound waves to compute physical motion overnight. You merely need to put the smartphone besides you in the bed.

When you wake up, you will get hard data regarding the duration of sleep, and the motion during sleep. This will tell you if you are getting quality sleep or not.

iPhones and iPads

iOS devices calculate the sleep in a different manner.

iPhones come with a Clock application which consists of a Bedtime feature. Bedtime allows users to schedule their time to go to bed and time to wake up. After setting the bedtime and waking time, the iPhone will give alerts at the respective times.

When you turn on Bedtime, the device will pay heed to what time you put your phone down and when do you unlock it after waking up. With this information, it will calculate the number of hours you spent sleeping.

Fitness Trackers

If you want to get detailed information regarding your sleep, then you should invest in a fitness tracker.

If you need a wearable sleep tracker, then getting Fitbit will be the right decision. Some latest FitBit models support Sleep Stages. This means that they track the heartbeat rate to determine how much.

Edward Lewis is a creative person who has been writing blogs and articles about cyber security. He writes about the latest updates regarding mcafee.com/activate and how it can improve the work  experience of users. His articles have been published in many popular e-magazines, blogs and websites.